Step 1 – Is it the first cut of the season or is the grass very high?
If Yes – Raise mowing height level to the highest level and let the mower complete full cycle (2-3 days). Then gradually lower the height of cut to what you need.
If No – Proceed to Step 2.
Step 2 – Was there any change in the mower’s Service Settings lately?
If Yes – Open Mowing Settings (Service ⇢ 897 ⇢ Settings ⇢ Mowing Motors) and check that all settings are in default values per the tables below.
On/OffEnable/disable mowing motors operation ON
| Mowing Motors Operation | ||
|---|---|---|
| Setting | Description | Default Value |
| Eco Mode | ||
|---|---|---|
| Setting | Description | Default Value |
| On/Off | Enable/disable ECO mode operation | ON |
| Speed ⇢ On Speed | Mow motor RPM during ECO mode on | 3300 |
| Speed ⇢ Off Speed | Mow motor RPM during ECO mode off | 4000 |
| Sensitivity | The current threshold in which ECO mode on will be terminated | 2 Amps |
| Over Current | ||
|---|---|---|
| Setting | Description | Default Value |
| Sensitivity | The current threshold in which Over Current event is detected | 5 Amps |
| Time | The time the mower will allow to the Over Current sensitivity value to be present before an over current event is detected | 1 Second |
Time: The time for the mowing motors to resume operation after one of the Safety sensors in the mower is detected and released. For example, if a bumper event is detected the mowing motors are stop immediately. Once the mower detects that it is OK to resume motors operation, it will count this “Stop time” and only then resume operation1 Second
| Stop Time | ||
|---|---|---|
| Setting | Description | Default Value |
Left: Direction of the left mowing motor rotations CCW (counter-clockwise). Right: Direction of the right mowing motor rotations CW (clockwise).
| Direction | ||
|---|---|---|
| Setting | Description | Default Value |
If No – Proceed to Step 3.
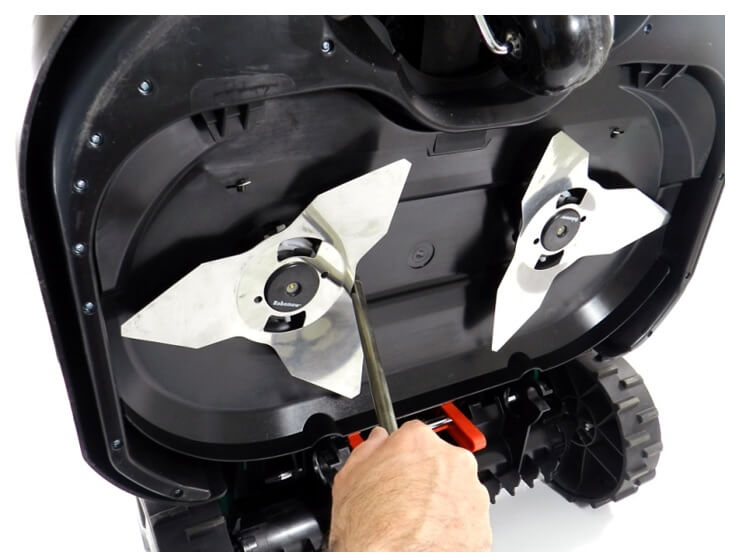
Step 3 – Turn the Safety/Main Switch OFF, remove the mower out of its base station and carefully (using a stick, screwdriver or heavy gloves) check whether the mowing blades are freely rotating. If one or both blades are not rotating freely, proceed to Step 4.
Step 4 – Can you confirm the mowing deck is clean and the blades can rotate freely?
If Yes – Proceed to Step 5.
If No – Clean the mowing deck and proceed to Step 5.
Step 5 – Place the mower in a place where there is no high grass (you don’t want the blades to mow in this test) and run a Mowing test. Did the test result in “Passed” message?
If Yes – Proceed to Step 6.
If No – Proceed to Step 7.
Step 6 – Place the mower in a place where there is no high grass, make sure the mowing height is in its fully upper position – 80, and send the mower to mow. Will the mower stop with a mowing error message?
If Yes – Proceed to Step 7.
If No – Let the mower work. Reduce mowing height gradually.
Step 7 – Raise the mower’s drive wheels a few inches in the air (inside a lawn, where you have good wire signal). Go to Service ⇢ 897 ⇢ Settings ⇢ Special Displays ⇢ Mowing Motors. Send the mower to mow by pressing GO and look at the Mowing motors readings.
Do any of the mowing motors indicate high current level in one of the motors? (Good values are 600-850 mA.)
If Yes – Proceed to Step 8.
If No – Let the mower work. Reduce mowing height gradually.
Step 8 – Swap the two mowing motors – right to left and left to right and repeat Step 7 above. Does the the high current level that was shown previously in Step 7 repeat itself? For example, if you had high current on the right mowing motor, once swapped, does it now show high current on the left motor?
If Yes – Replace the High Current Mowing Motor
If No – Proceed to Step 9.
Step 9 – Replace the parts in this order:
- Replace Both Mowing Motors and see if Mowing motors test passes.
- Replace high current mowing motor side wire harness.
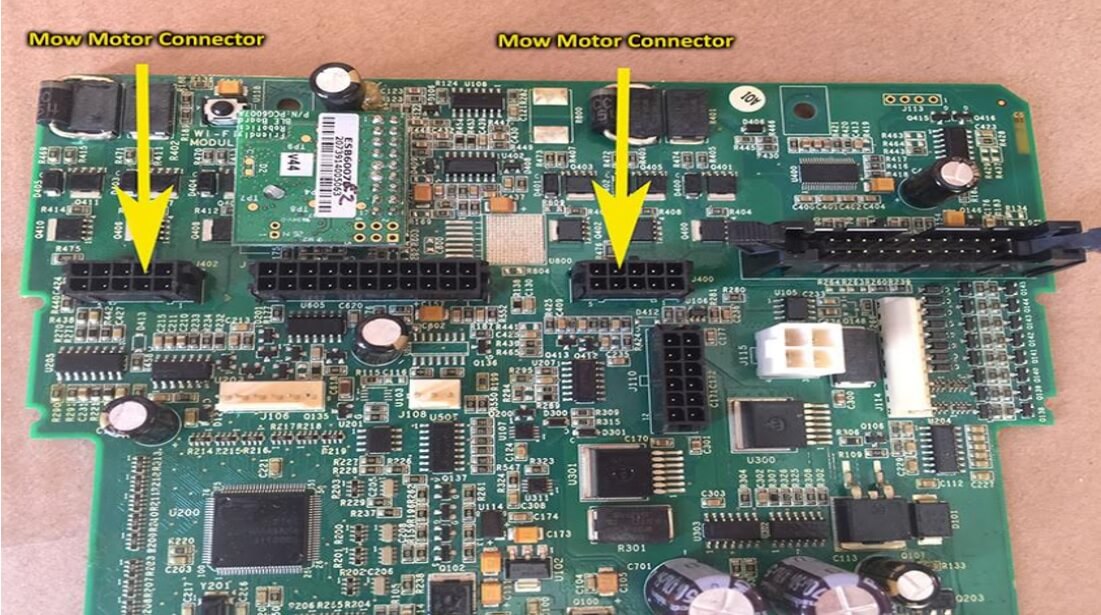
- Replace the Main Board. An indication for needing to replace a main board here will be “Mow Motor Disconnected” message at the mowing test result.